Happy Sunday all! It's been a while since I posted anything but it's because I have been taking care of my poor broken hubs. He had some orthopedic surgery on his hip and has needed a little extra TLC. I know- all of these surgeries would make you think that we are in our mid 60's rather than our mid 20's but we just hope this means we are getting all the yucky stuff out of the way now so we can play hard later on.
I am so excited that it is finally beginning to feel like fall in our corner of the world. I adore the changing of the leaves, the cooler weather ( I love sweaters) and, of course, crafting and decorating for the holidays. Since its October, I am of course working on Christmas decorations. I'm just kidding ya (even though there are already decorations out at Target, Walmart, Michaels, etc.); I am working on Halloween decorations. For a long list of reasons, Halloween is not my favorite holiday. I know, I'm weird. But I do love crafting for Halloween. And I'm thrilled to have any reason to decorate so I am learning to embrace the holiday one baby step at a time. To start of the Halloween season at our apartment, I created this darling little center piece for our table. And because I was smart enough to think ahead, I even took pictures. Yeah me!
BOOtiful pumpkins
Supplies:
-3 Pumpkins (mine are fake, but this would work on real ones as well)
-Sticker letters: 1 B and 2 O's
-Modge Podge
-Black Paint
-Paint brush
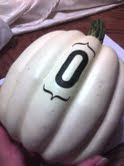
Ok, so I said that I thought ahead, but I admit that I did not take a picture of step one. I modge podged one letter on each pumpkin. You can hand paint this or hand draw it with a sharpie, but I had the stickers on hand so I opted to go that route. I also used some of the extra punctuation stickers to frame the top and bottom because the letters looked so plain by themselves. Then I let the modge podge dry. (Sorry, I didn't realize how fuzzy the pictures were)
Once that is all nice and dry, get out our paint and paint brush. Using the non-bristled side of the brush, dip the end of the brush in the paint like so:
Once you have the paint, start painting dots on your pumpkin. I free-handed my design but it might be more time effective to stencil out your design first. Here is side one of my pumpkin:
Now complete on the opposite side. Repeat on the other two pumpkins and tada!
With some creepy candles and some leaves, this little center piece almost makes me like Halloween.... almost.


Love, love, love the pumpkins, especially because you used the nontraditional white ones!
ReplyDelete